How to clean an HP Printhead
Have you noticed that your printer starts to print with spots, dull colors, or blurry text? Perhaps the printheads in your machine are clogged, which prevents getting high-quality prints. Don’t worry. It may occasionally happen, especially if you haven’t used the printer in a few weeks. In that case, the cartridges simply dry out, and you can just replace them. However, what if you could extend the cartridge’s life and delay purchasing a new pack of cartridges?
Usually, you just need to clean the printheads, which can be done at home alone. In our guide, we will help you learn the type of printheads and how to clean printhead on HP printer or any other brand quickly and efficiently.
Printheads are…
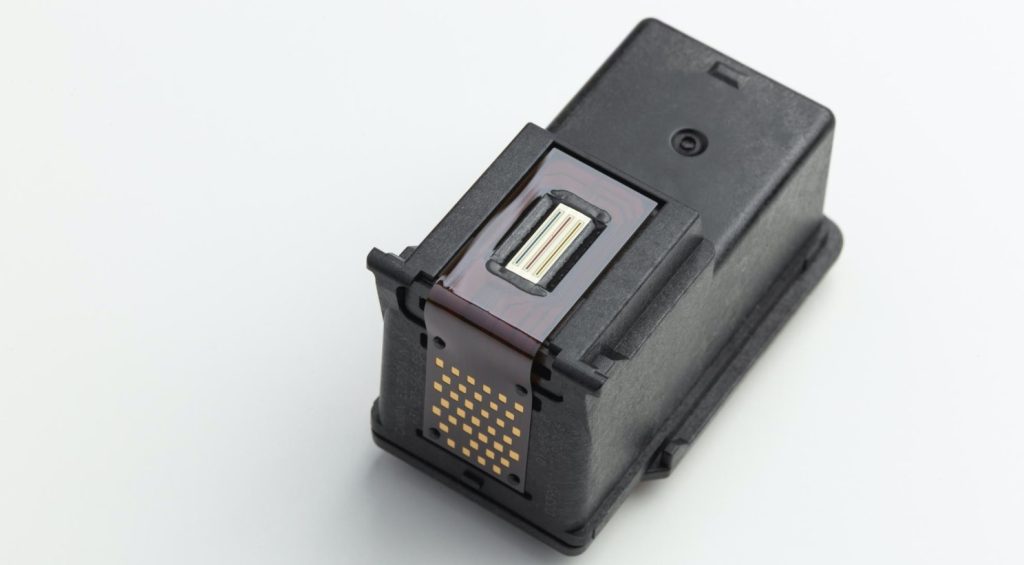
Printer or cartridge elements that transfer ink onto the page by firing ink droplets through printer nozzles. When air or dust particles get into one of the nozzles, it becomes clogged, and the print quality deteriorates significantly.

Types of HP printheads
Depending on which printer you use, you may encounter one of two types:
- Printheads connected to printer cartridges. In that type, printheads are integrated into the cartridges. Thus, by buying a new cartridge, you change the printhead simultaneously. If you see that some color starts to print worse than others and cleaning the printhead does not give results, simply buy a new pack. You can even reduce your costs by purchasing compatible and remanufactured cartridges from manufacturers such as Smart Ink.
HP produces integrated printer cartridges only in black and tri-color like HP 61, 62, 63, 64, 65, and 67 series.
- Printheads integrated into the printer. Unlike printheads connected to cartridges, nozzles are integrated into the printer and cannot be replaced with a new set. Instead, you have to buy printheads separately, but changing them that way will be even more expensive than buying a new printer.
For example, these are series without built-in printheads: HP 951 ink cartridges and models similar to them, like 902, 950, 952, and 972.
Automatic cleaning for HP printheads
Each printer has a built-in cleaning function. In the case of HP models, users can choose “printhead cleaning” themselves or let the machine go through “automatic servicing.” However, the latter can’t always solve the issue, so we suggest you read the short instruction to learn how to clean HP printhead.
Here is an example of how to clean HP 8600 printhead automatically:
- Switch on the printer.
- Put into the input tray a few white papers reserved for printing.
- Find additional options in the control panel by pressing the right arrow.
- Select the option named Setup, and then choose “Tools.” There will be an option called “Clean Printhead.” Select it to clean HP 8600 printhead.
- Your printer will go through 3 cleaning stages. After each stage, it will ask if the issue is resolved. Choose “Yes” to stop the cleaning process or “No” to go to the next cleaning stage.

That process suits various printers, but we recommend you check the printer guidebook for instructions specific to your machine.
How to clean the printhead integrated into printers
- Find a dry paper towel or two. Then put folded into quarter paper towels in a plastic container. Place it inside the plastic container. Then add hot water until the towels are fully covered.
- Take all cartridges out of your printer and put them onto a separate paper towel. Remember to place them bottom up to not damage any important elements or spill the ink.
- Lift the gray latch to release and take the printhead from the printer. You can find it behind the carriage with cartridges.
- Gently wipe the printhead nozzles with a lint-free and wet cloth to remove excessive ink leftovers.
- Take the printhead and put it into the container with the paper towel. Ensure the nozzle faces down and let it soak for about 10 minutes. Remember that you shouldn’t touch the nozzle to prevent any potential damage.
- Take the printhead out of the container and put it on the dry paper towels — it should take around 15 minutes. Remember that the nozzle should be facing upwards.
- Put the printhead, the latch, and the cartridges back into the printer. To finish up, run auto cleaning one more time.
You can use that method with various printer models, even of other brands, with built-in printheads.
How to clean printheads connected to cartridges
- Remove dried ink from the printhead by pressing warm and wet paper towels onto it. Ensure you are holding the printhead facing down.
- Keep the position like in the previous step and put the cartridge onto a dry paper towel. It should stay that way for 2 – 3 minutes to remove all the moisture. In addition, the towel will absorb excess ink. Don’t wipe the printhead. It may lead to some unwanted damage.
- Install cartridges back into the machine and try to print something. If the issue with print quality is still there, you can always buy a new pack at Smart Ink.
We hope our instructions will help you keep your cartridges and printers in top shape. However, if after all the cleaning steps you still have any problem with the printing quality, just order a new pack of cartridges at Smart Ink. There you will get not only qualities similar to OEM products but also more reasonable price offers. Print smart with Smart Ink!


