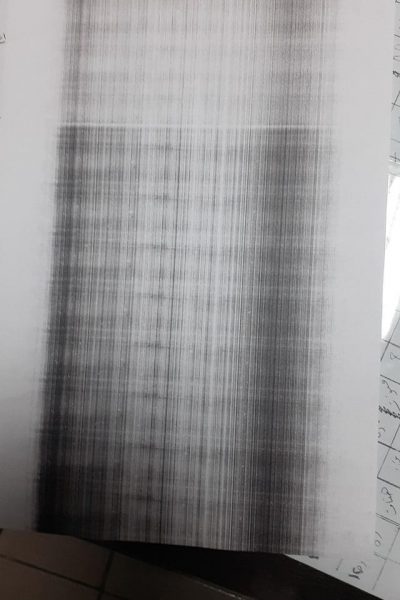
If you notice vertical/horizontal lines, poor printing quality, or just blank pages appearing during printing, it can cause general printing issues. This problem with your Canon printer can quickly disrupt your printing tasks.
NOTE
Please Check Cartridge Compatibility
Confirm the new cartridge is compatible with your printer model. Using an incompatible cartridge can lead to errors. Double-check the cartridge model number against the printer’s specifications.
How to Automatically Clean a Canon Printhead

Ensure the printer is on, then touch the setup (gear icon) on the printer display home screen.

Select the maintenance (tools) icon.

Choose “Cleaning” and then select “Yes”.

Click Yes. The printer will go through the cleaning process for about a minute. After it’s done, you can print a nozzle check test page to see if the cleaning improved the print quality.
To Print a Nozzle Check Page:
Touch the setup gear icon again, and then the “maintenance” icon.
Select “print nozzle check pattern” and touch “Yes”. This will print the nozzle check page.
If the colors look complete, the printhead is thoroughly cleaned and you can continue printing.
If there are missing lines or streaks, you may want to run a second cleaning or perform a deep cleaning on the printer.
To Run a Deep Cleaning:
Follow the same steps as for regular cleaning.
Instead of selecting “Cleaning”, select “Deep Cleaning”.
This process uses more ink, so it should not be done too frequently.
Additional Steps:
If the cartridges still aren’t printing properly after cleaning, you can try replacing the cartridges or follow the steps below to manually clean the Canon printhead.
Manually Cleaning an Integrated Cartridge:
If your printer uses cartridges with an integrated printhead, you can try the “paper towel method” to fix your print quality issue.
Required Supplies:
A warm, damp paper towel
A dry paper towel
- Blot the cartridge: Take a warm, damp paper towel or coffee filter and blot the cartridge with the printhead facing down onto the paper towel. This will remove any dried ink on the printhead.
- Wick the ink out: Hold the cartridge with the printhead facing down against a dry paper towel for 2-3 minutes. Do not wipe the printhead as this may cause damage.
- Reinstall the cartridge and try printing again. If the print quality is still poor, you may need to replace your printer cartridge.
By following these steps, you should be able to overcome the problem with bad quality printing. If these steps do not resolve the issue, please get back to Smart Ink customer service for additional help.

